How to Write and Test Ansible Playbooks on Windows Using WSL2. The Ultimate Guide
Overview
Writing playbooks on a Windows host can sometimes be a bit challenging. This guide describes the ultimate setup for writing playbooks efficiently. After reading, you will have a well-configured Ansible environment, a proper VS Code setup, ansible-lint installed, and some useful tips.
WSL Install
WSL allows you to run a Linux distribution on your Windows machine, enabling you to use Linux commands and tools seamlessly. Follow these steps to install and set up WSL on your Windows system. Open a elevated powershell terminal on you device.
1wsl --install
This command will install WSL 2, set it as default, and install the Ubuntu Linux distribution by default. Restart your computer if prompted.
The Ubuntu distribution is fine for our work. Other distro's are possible but out of scope of this guide.
After the reboot the WSL terminal should open up asking for your username and password, in our example we want to set the user to ansible and the password as any value we wish. Once ready we need to configure out WSL instance and Ansible.
Setup WSL for Ansible
You can install Ansible directly in the Ubuntu distro. But because I have sometimes to develop en test Ansible playbooks, roles en collections on multiple different versions I use Python VENV's.
What Are Python Virtual Environments (venv) in the Context of Ansible?
When working with Ansible, managing dependencies is crucial to ensure compatibility across different projects and avoid conflicts between Python packages. This is where Python virtual environments (venv) come in. A venv is an isolated Python environment that allows you to install and manage packages separately from the system-wide Python installation.
In the context of Ansible, using a virtual environment helps you:
- ✅ Avoid conflicts with other Python-based tools or system dependencies.
- ✅ Maintain project-specific versions of Ansible and its required libraries.
- ✅ Easily upgrade or test different Ansible versions without affecting your entire system.
Setup Python venv
First we need to install Python3 the requirements
1sudo apt-get update
2sudo apt-get install -y git python3 python3-pip python3-venv
After the install of Python3 we can make a virtual enviroment.
1python3 -m venv ~/ansible-venv
2source ~/ansible-venv/bin/activate
The first command create the environment, the second command activates the environment. after that we install Ansible with pip
1pip install ansible
Or if you wish a specific version, you can specify that version.
1pip install ansible==2.9.20
When you develop playbook for windows machines install also the winrm Python Module.
1pip install pywinrm
After installation of Ansible check if the corresponding version is installed.
1ansible --version
Setup a default inventory.
Since I mostly develop Ansible playbooks for Windows machines, I use automated labs on my machine. Below is a typical simple inventory file (inventory.yml):
 1windows:
 2  vars:
 3    ansible_user: administrator
 4    ansible_connection: winrm
 5    ansible_winrm_server_cert_validation: ignore
 6    ansible_port: 5985
 7    ansible_winrm_kerberos_delegation: true
 8    ansible_winrm_message_encryption: auto
 9    ansible_winrm_operation_timeout_sec: 880
10    ansible_winrm_read_timeout_sec: 990
11    ansible_winrm_transport: ntlm
12  hosts:
13    dev-srv1:
14    dev-dc1:
Normally, in all Ansible commands, you must specify the inventory file location. However, you can save this in your configuration. Ansible allows default configuration settings in three locations:
Global: /etc/ansible/ansible.cfg User-specific: ~/.ansible.cfg Project-specific: In the root directory of your project
Example of ansible.cfg with a default inventory file.
1[defaults]
2inventory = /path/to/your/inventory
environment variable default inventory
You can also create a environment variable to specify a default inventory
1export ANSIBLE_INVENTORY=/path/to/your/inventory
Ansible-lint setup
Ansible Lint is a powerful tool that helps you maintain clean, efficient, and error-free Ansible playbooks. It enforces best practices and catches common mistakes before they cause issues in production.
You can install Ansible-Lint in the same virtual environment as Ansible or create a separate one to keep it independent. I use a separate venv for this purpose:
1  python3 -m venv venvs/ansible-lint-env
2  source venvs/ansible-lint-env/bin/activate
3  pip install ansible-lint
4  ansible-lint --version
I a later step we configure VS-code to use this version of Ansible-lint
Setup VS-Code
I use VS Code to write my Ansible playbooks. VS Code has excellent extensions for Ansible and WSL2.
- Install VS Code on your Windows machine if you haven’t already.
- In VS Code, go to Extensions and install the Microsoft WSL extension.
After installing the extension, you can connect to your Linux distribution running in WSL.

After extension install, you can connect from VS-Code to you Linux distribution running in WSL.

I you have multiple WSL distrubutions you can choose between the distributions.

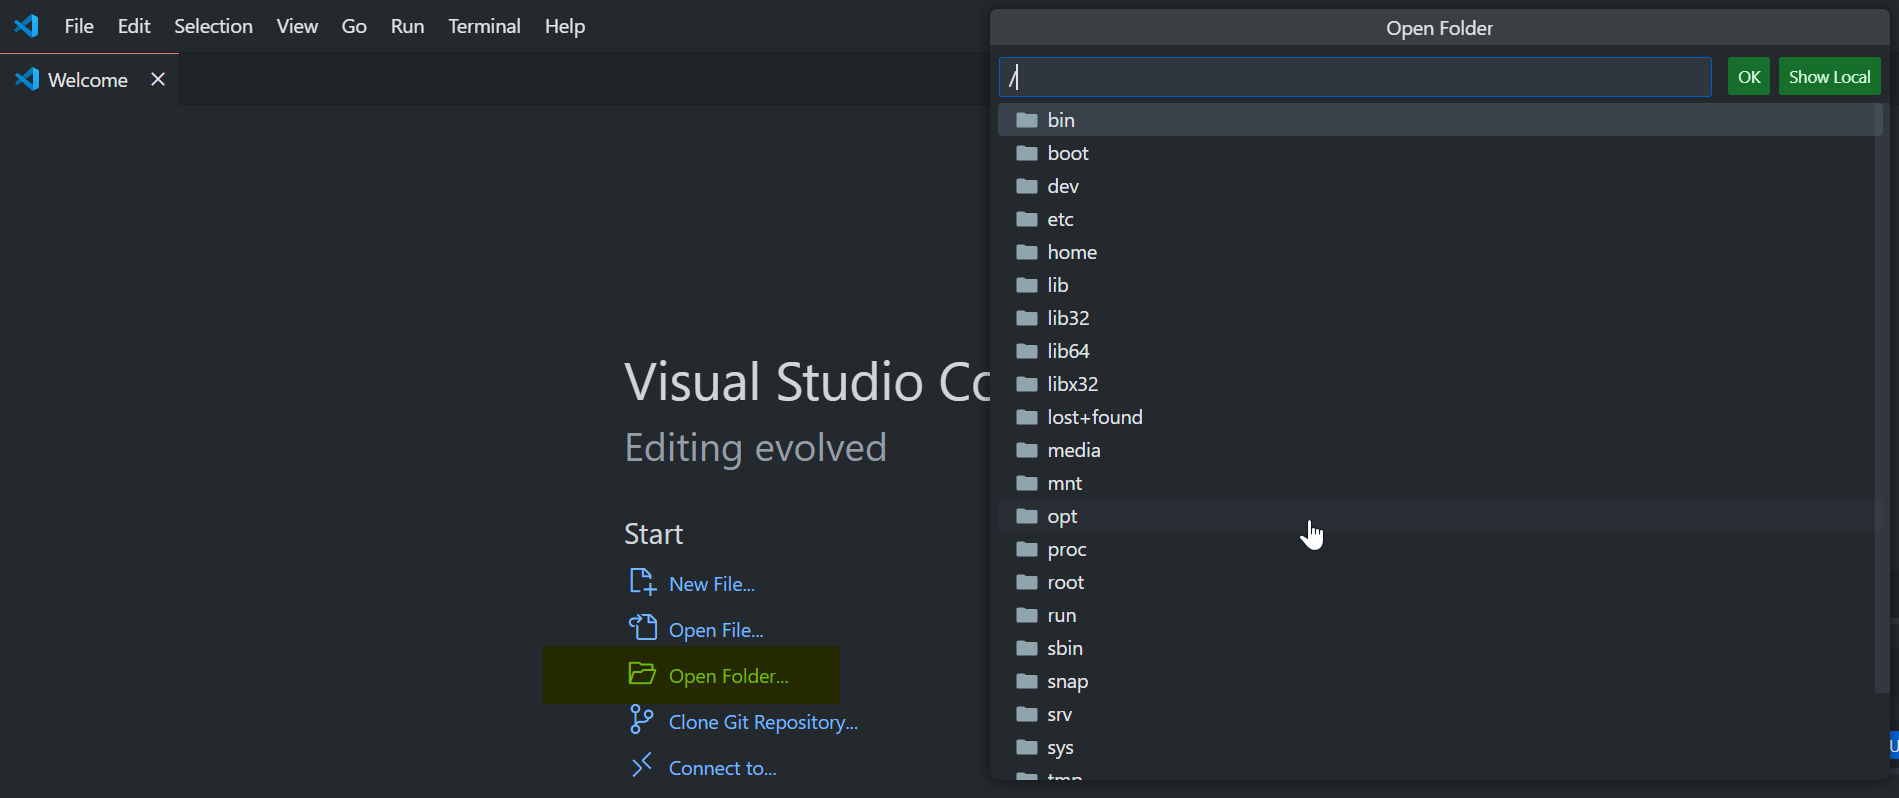
After that you can open you project folder. As you see the folder structure goes to the Linux machine but you can also choose your windows folder structure trough show local
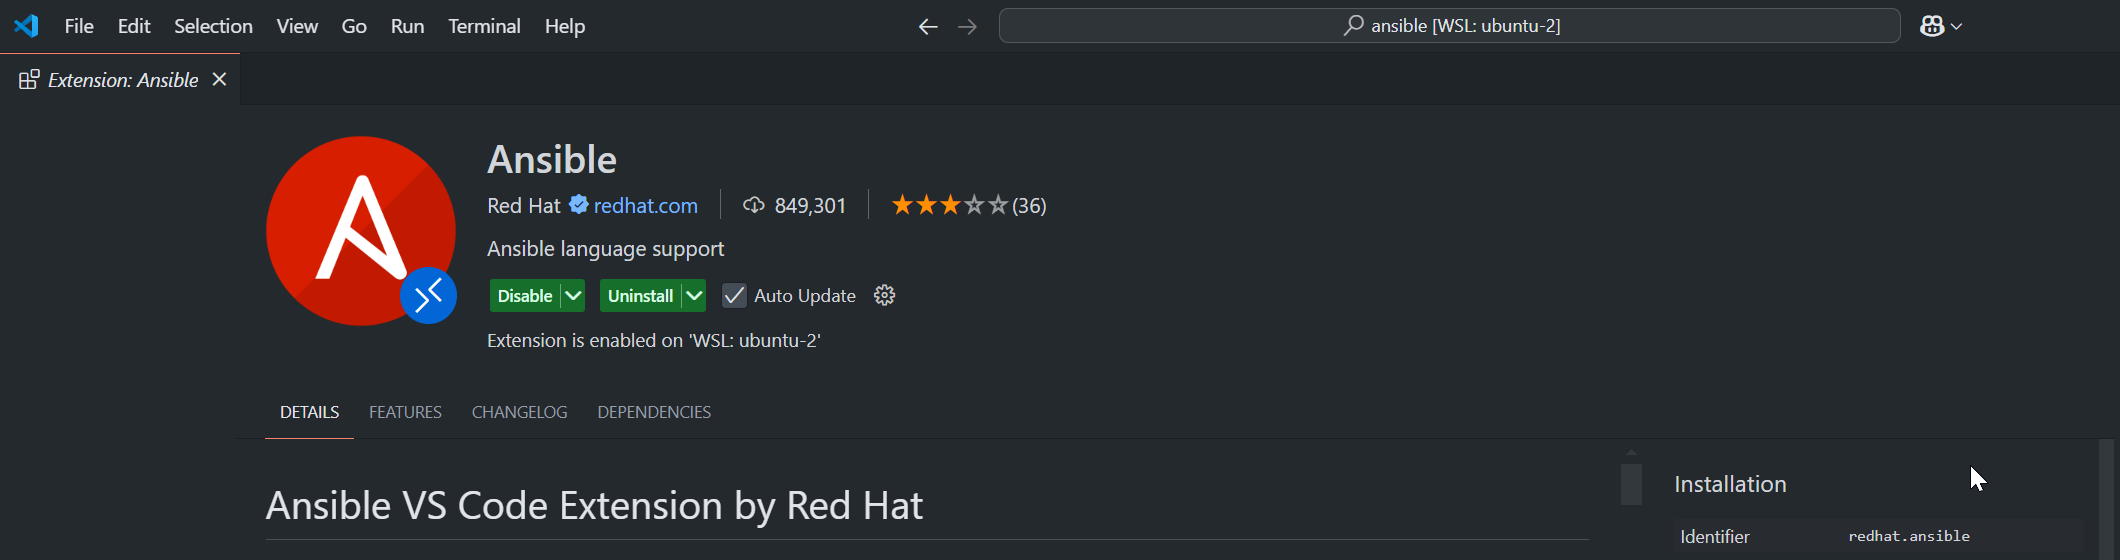
Ansible extension in VS-code
When connected to to WSl distribution install the Ansible extension in VS-Code. For syntax highlighting
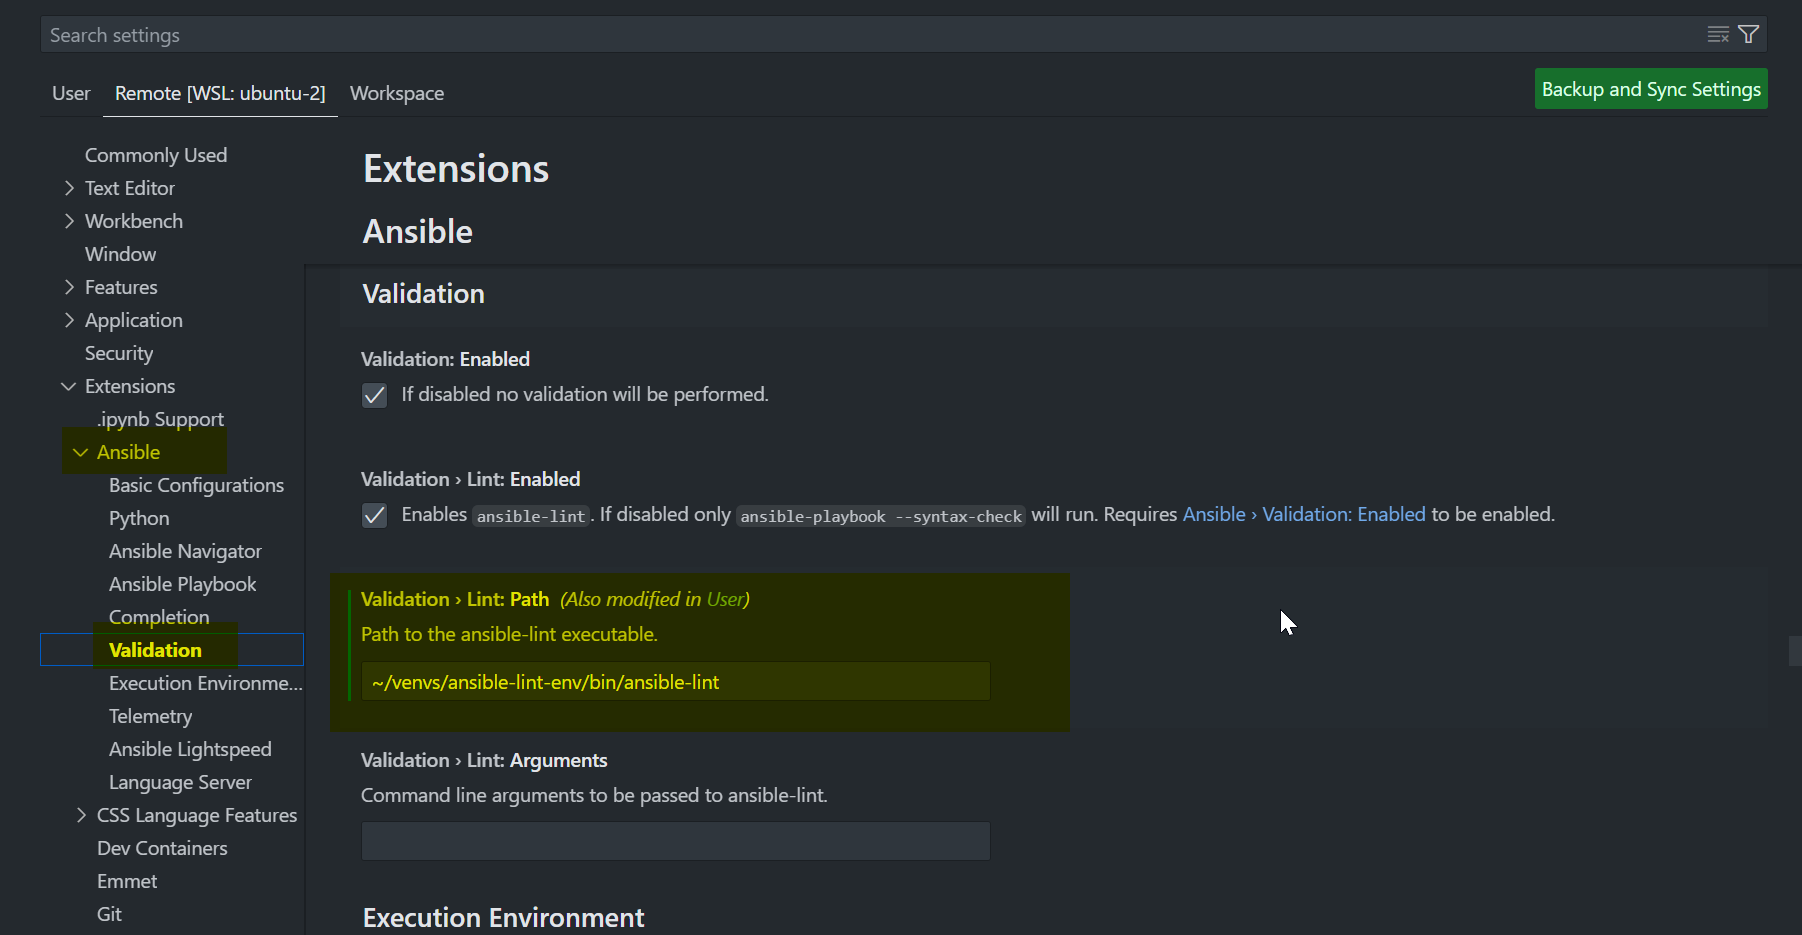
configure VS-code to use ansible-lint en the venv
In order to use ansible-lint correctly. You have to configure the Ansible plugin in VS-code where to find ansible-lint.
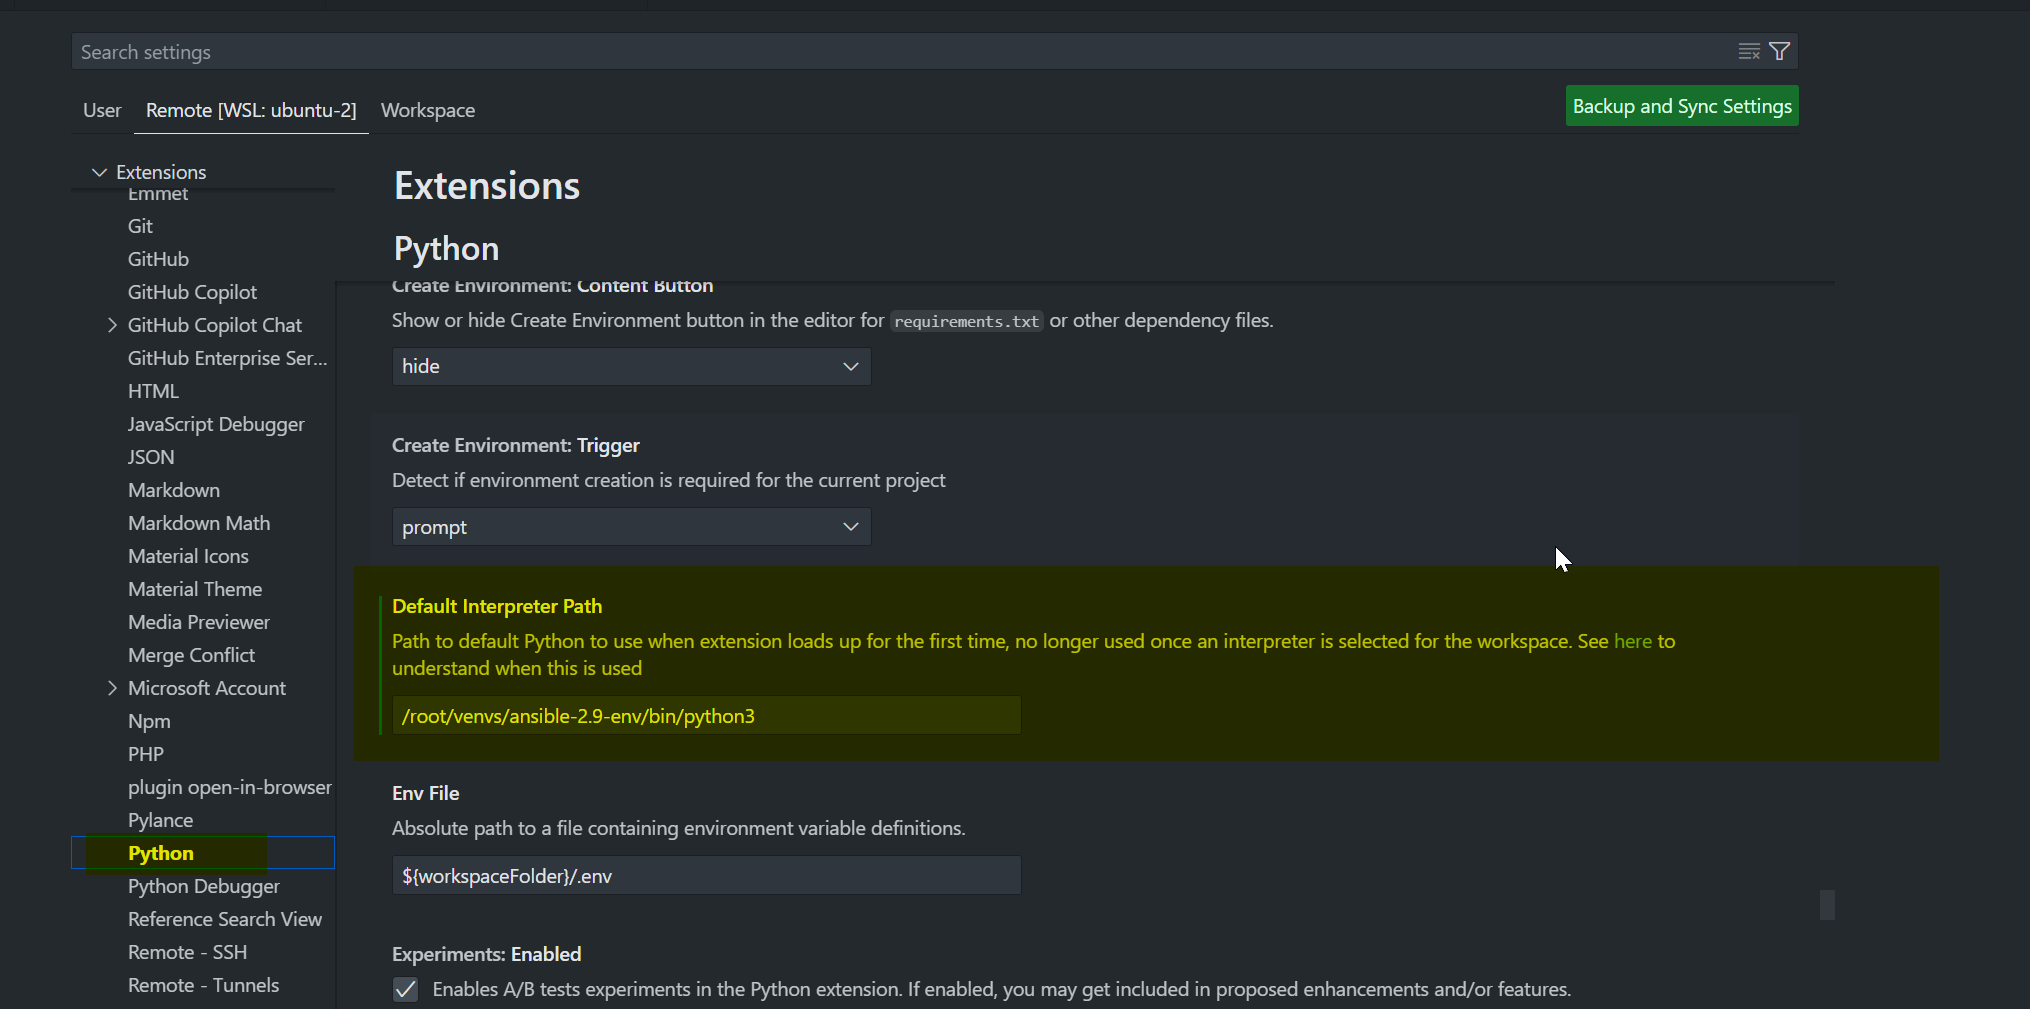
Default python path for Ansible
Demo of syntax highlighting and completing
After installation, you will have syntax highlighting, code completion, and error correction. See the video below for a demonstration. When you hover over an Ansible keyword, you will see useful information and configuration options. Additionally, by pressing Ctrl + Click on an Ansible keyword, you can navigate directly to the official documentation.
Additional VS-Code tips
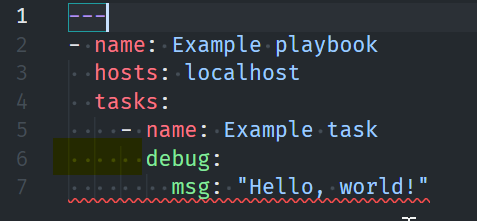
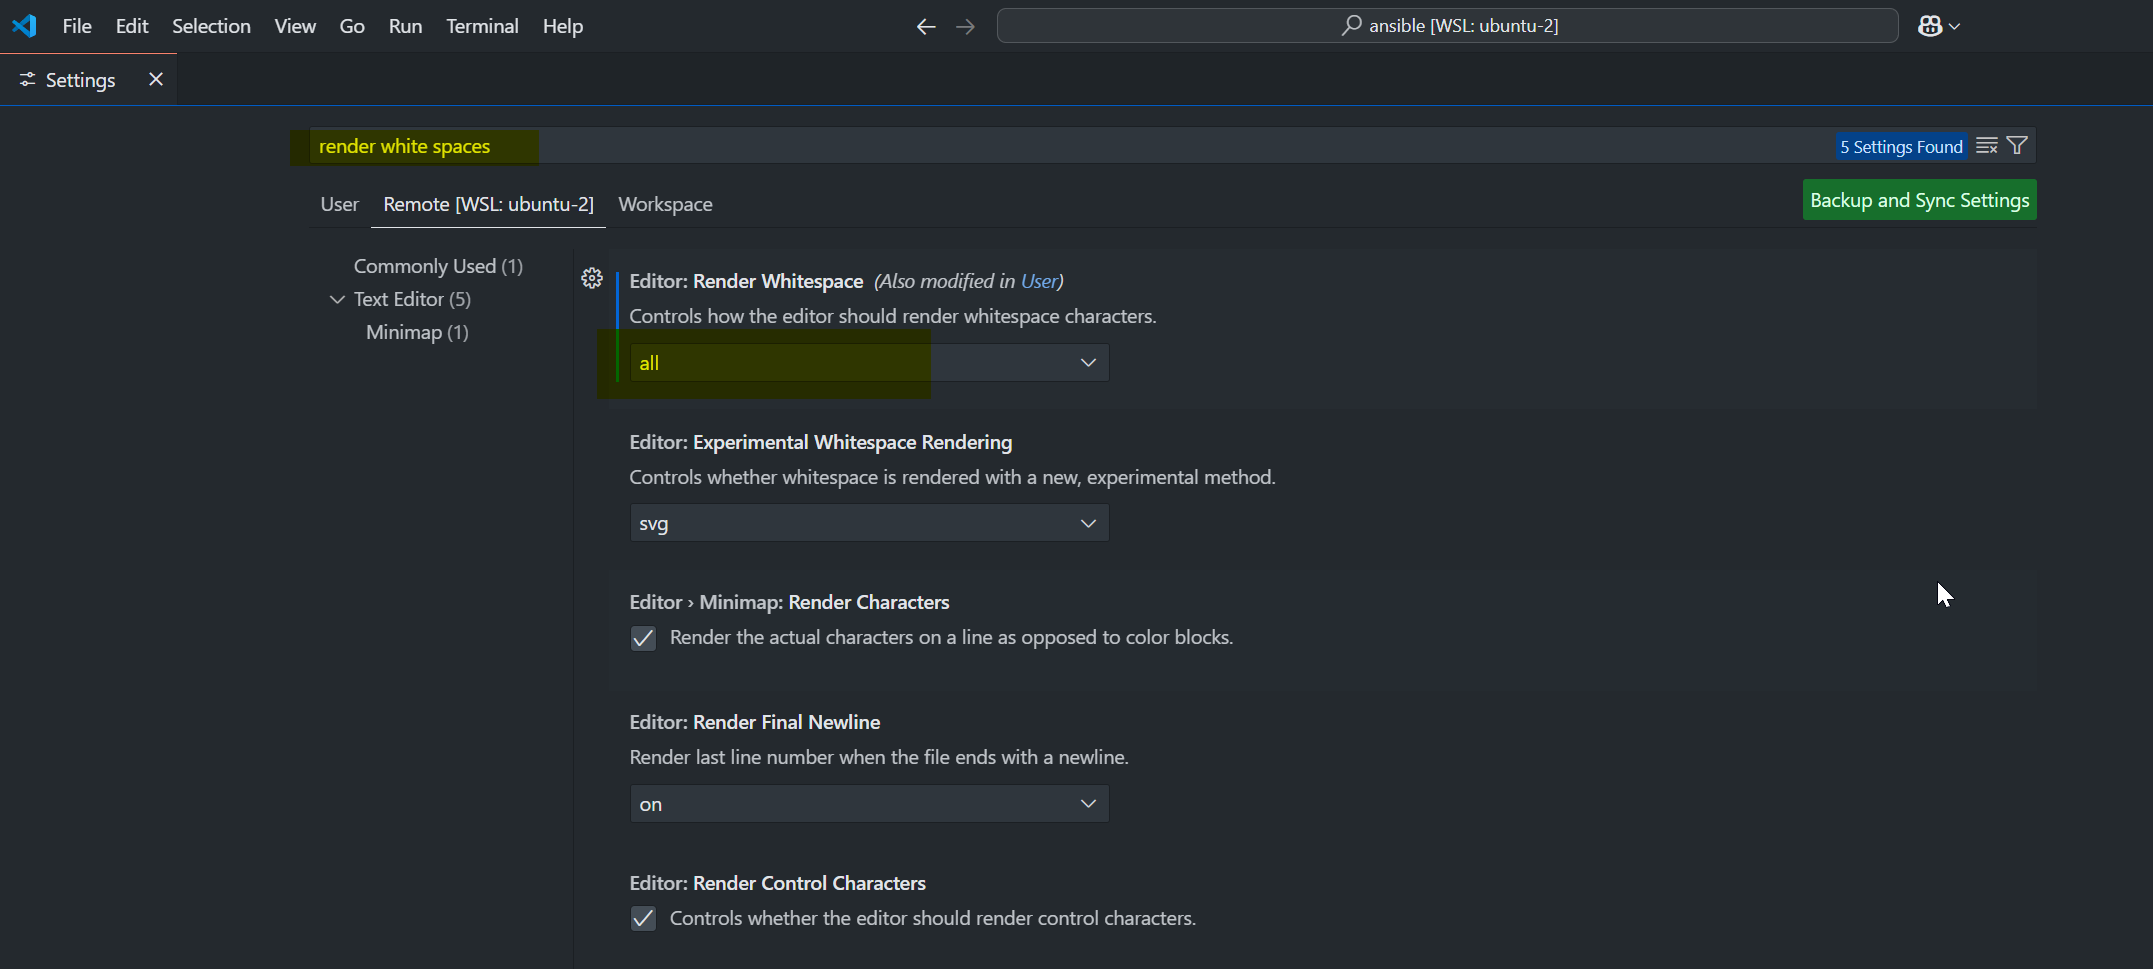
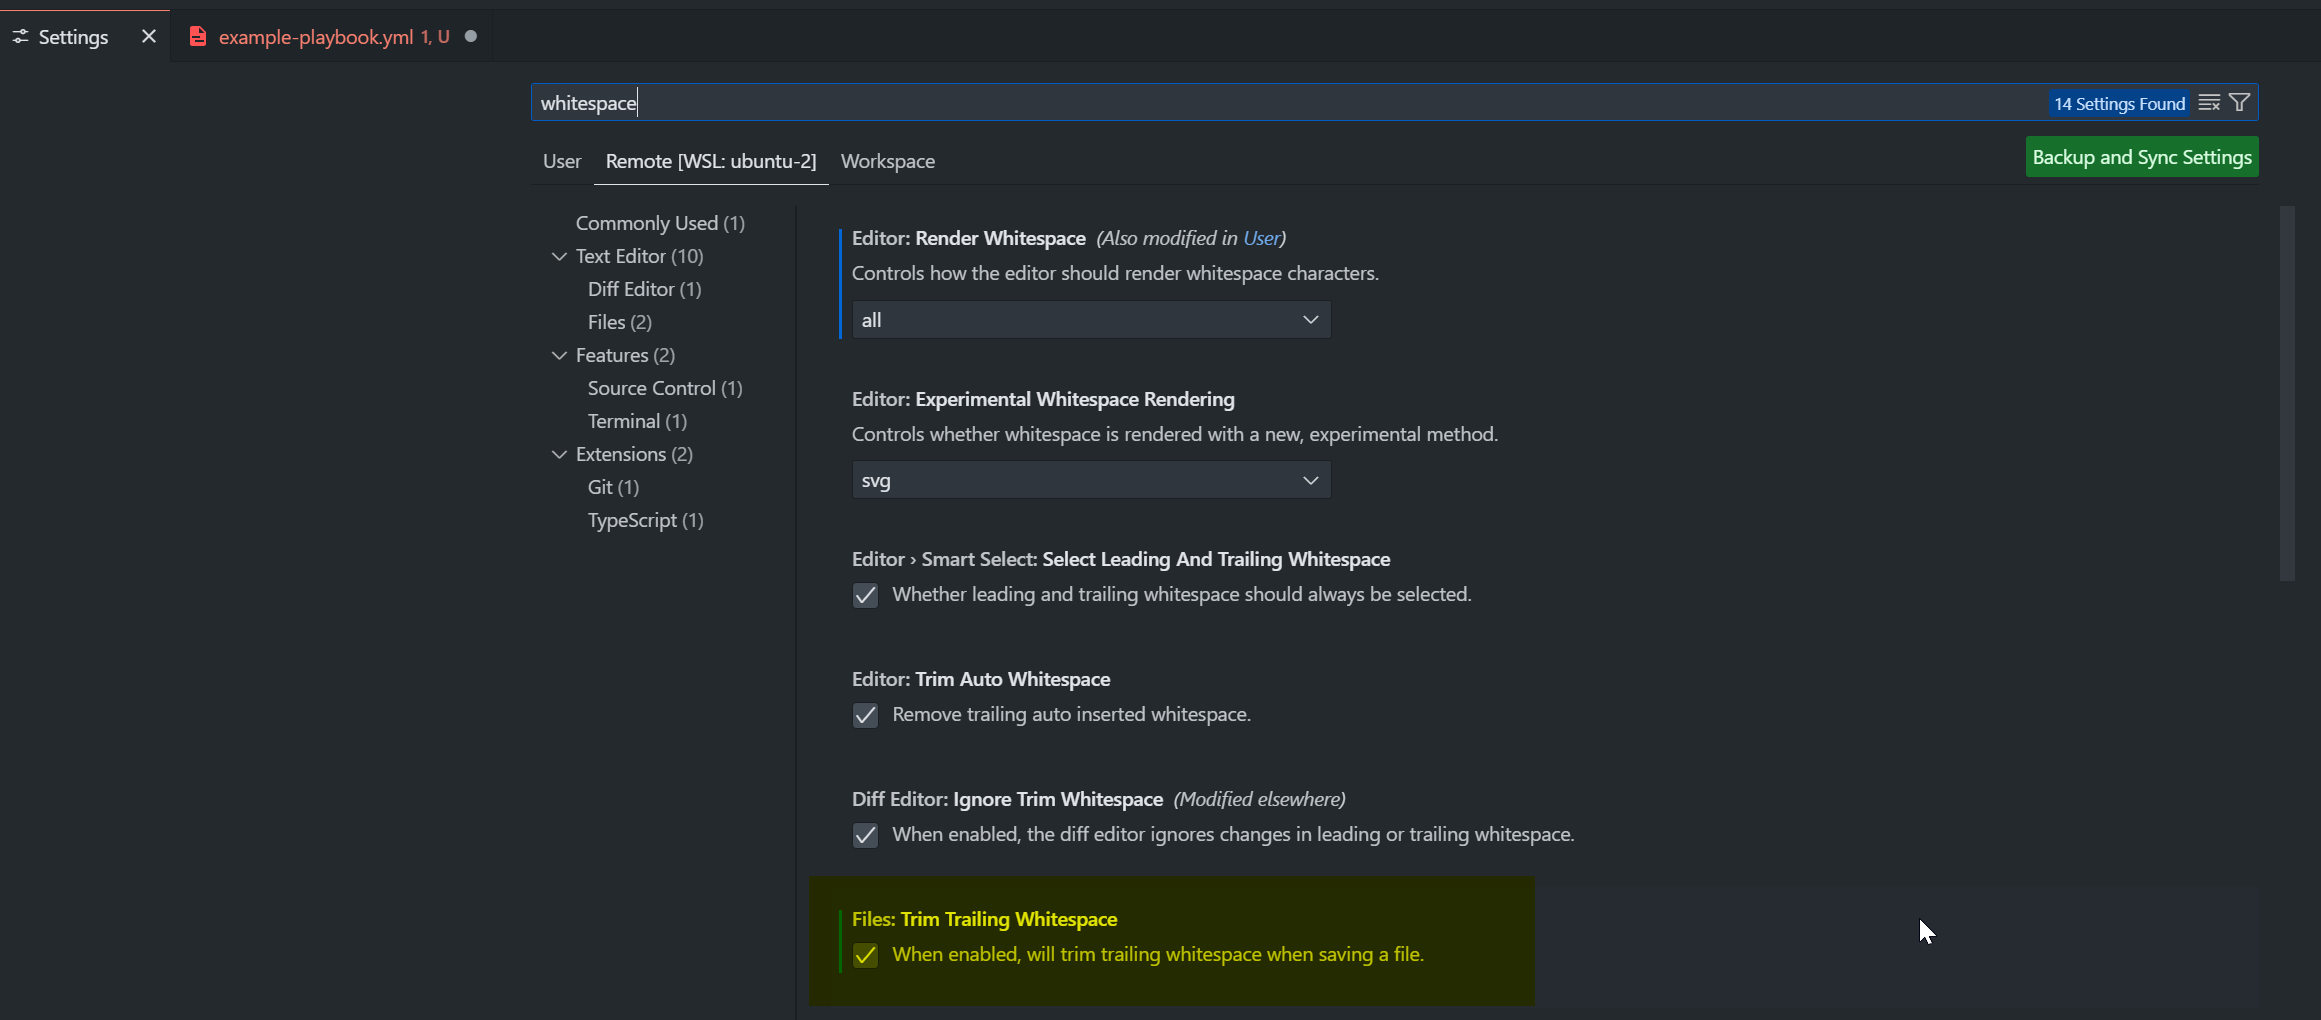
White space rendering
Indentation is very important in YAML, the language used for writing Ansible playbooks. Even a single extra or missing space can cause errors. Here’s a useful trick to visualize spaces in VS Code: By enabling the setting below, spaces will be represented by dots, making indentation issues easier to detect.
Automatic format ansible playbooks for ansible-lint
Automatically format ansible playbooks for ansible-lint with problems such as trailing spaces, many newlines, spaces at the end is very easy.
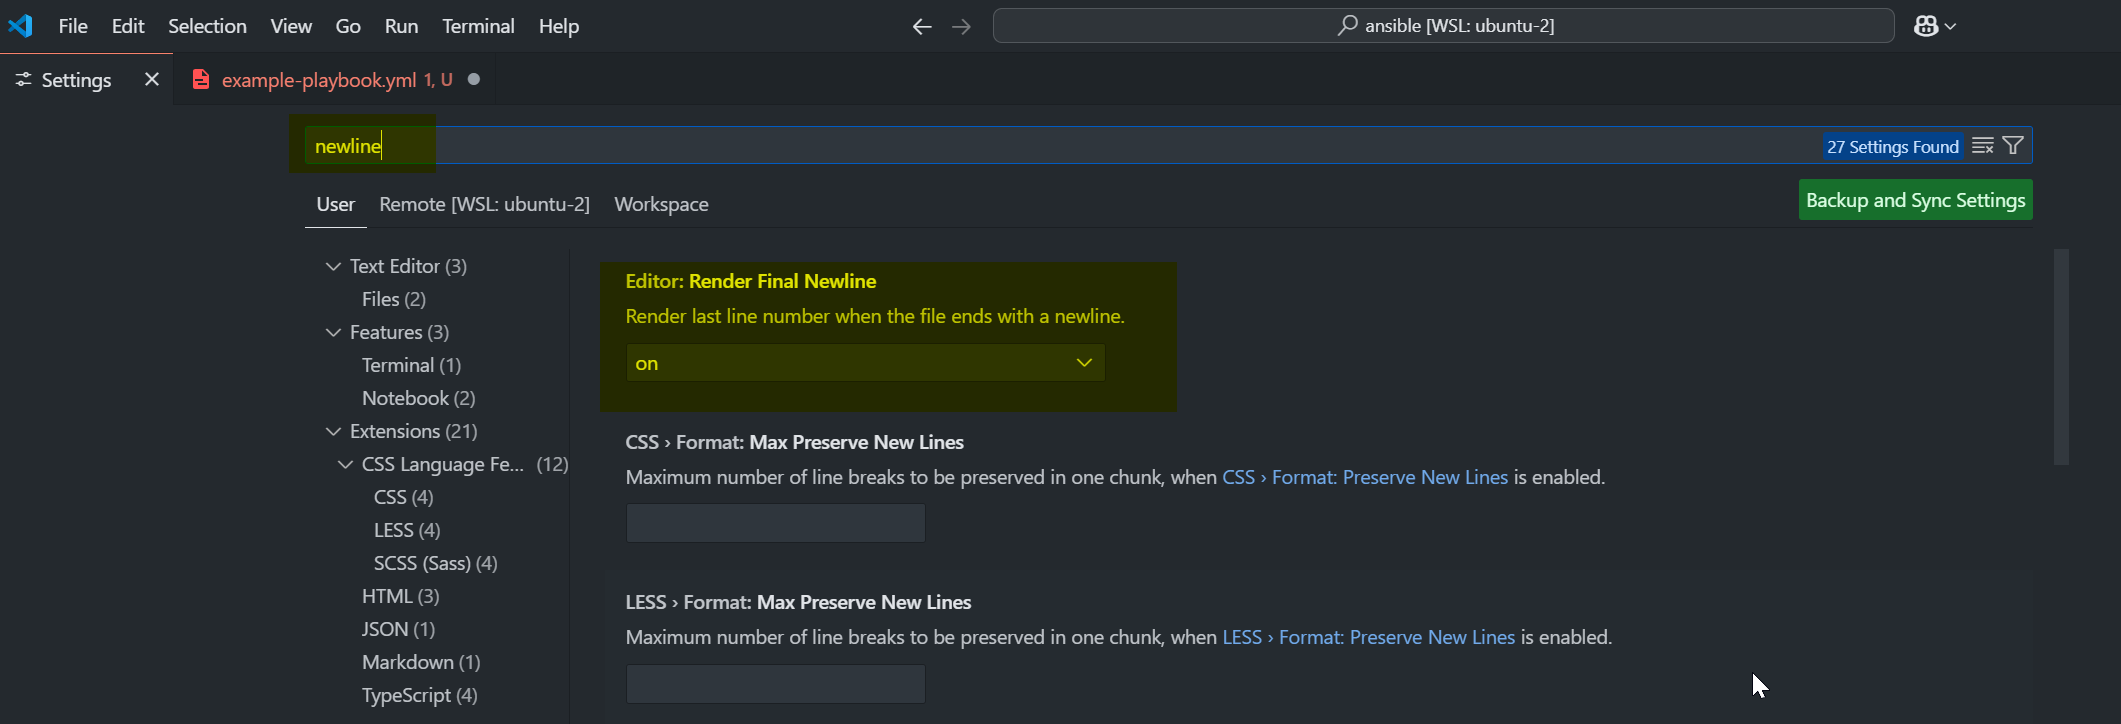
Trim all the final new lines
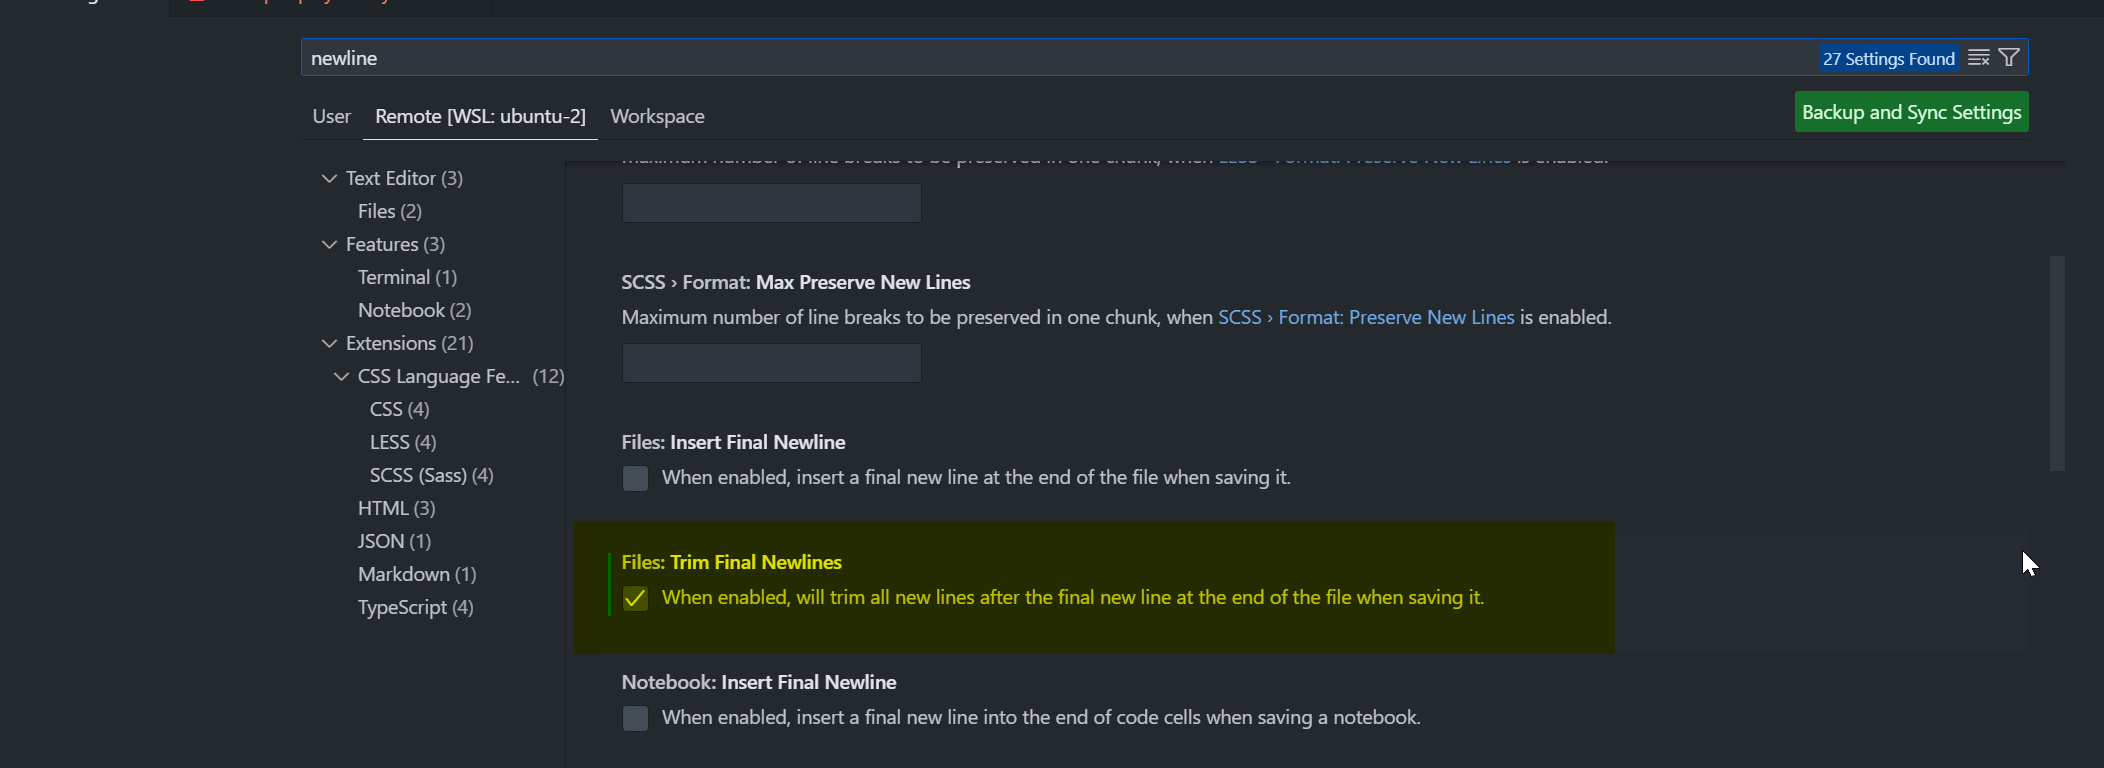
Trim trailing whitespaces
Many thanx for Sean Cavanaugh for posting some Youtube video's about the settings.
Overview of total settings
1{
2    "files.trimFinalNewlines": true,
3    "files.trimTrailingWhitespace": true,
4    "editor.renderWhitespace": "all",
5    "python.defaultInterpreterPath": "~/venvs/venvs/ansible-2.9-env/bin/python3",
6    "ansible.validation.lint.path": "~/venvs/ansible-lint-env/bin/ansible-lint",
7    // set lf line feed
8    "files.eol": "\n"
9}
This guide ensures that you have a well-configured Ansible environment in WSL2, including a structured setup for Ansible-Lint, VS Code, and virtual environments. Happy automation!